Christmas Chestnut Cake: Recipe with History and Step-by-Step Photos
Published on December 15, 2025
In this blog post, I want to share the chestnut cake that we prepare almost every year at home during Christmas, and the story behind it. As the holidays approach, it seems like the perfect time to show it to you, and for that, I took some photos. They're not professional—my phone is one of those that come with the contract—but you can understand the process well.

Final view of the Christmas chestnut cake
The story behind the dessert
In Galicia, autumn always brought an abundance of chestnuts. After the traditional chestnut roasting festivals and family harvesting, baskets full of chestnuts filled the storage granaries. The challenge wasn't getting ingredients, but transforming that abundance into something that would brighten winter meals.
For special dinners, when resources were limited but spirits were high, chestnuts became the center of the dessert. First, roasted or cooked. Then, pureed. And finally, in this cake that united the simple with the festive.
The original recipe didn't contain sweetened condensed milk or cream cheese. Instead, it used what was available: clean pork fat, sugar, and milk, which when mixed with chestnut puree created a unique texture when cooled. It was an efficiency formula that transformed the ordinary into the extraordinary.
This version that I share today keeps the soul of the original—the chestnut puree, the touch of anise—but adapts to more accessible ingredients today. The result is the same: a dessert that tastes like tradition, ingenuity, and winters around the family table.
Let's go with the step-by-step recipe and photos so you can see the result.
Step-by-Step Recipe
For the sponge cake:
- 100 g chestnut puree
- 60 g white sugar
- 50 g soft wheat flour
- 3 g anise essence
- 2 egg yolks
- 20 ml whole milk
- 2 egg whites
- 15 g white sugar (for meringue)
For the filling and topping:
- 200 g chestnut puree
- 1 small can of sweetened condensed milk (about 200 g)
- 25 g Philadelphia-type cream cheese
- Chopped cooked chestnuts (for decoration)
Step 1: The base of the batter
In a bowl, I mix the sugar, flour, and chestnut puree. The latter can be homemade (from cooked and blended chestnuts) or bought at the supermarket, which is also valid and saves time.

Step 2: The touch of aroma
To this mixture I add anise. Anisette or anise essence gives the cake that special and traditional character, an aroma that makes it distinctive.

Step 3: Separate the eggs
I separate the yolks from the whites. We need two yolks and two whites. We reserve the whites for later, as they are key to making the cake fluffy.

Step 4: Combine the liquids
I add the milk and yolks to the dry mixture. I stir everything well until it becomes a homogeneous paste, without lumps.

Step 5: The meringue
I beat the whites with sugar until stiff peaks form. Then, I fold this meringue into the batter with soft, wrapping movements so it doesn't lose air and the cake stays light.

Note: At this point, there's no photo, but what I do is pour this mixture into a greased cake pan or lined with parchment paper. It's baked at 180 degrees for approximately 30 minutes.
Step 6: The filling (part 1)
While the cake bakes, I prepare the filling. I mix the chestnut puree with the sweetened condensed milk. I recommend using roasted chestnut puree if you can find it, because it provides an extra special flavor.

Step 7: The filling (part 2)
I add the cream cheese to the previous mixture. The cheese provides consistency and a very pleasant richness to the filling.

Step 8: The baked cake
This is the result after baking. The cake has risen well, is golden brown, and smells wonderfully of chestnut and anise. It's important to let it cool completely before handling.

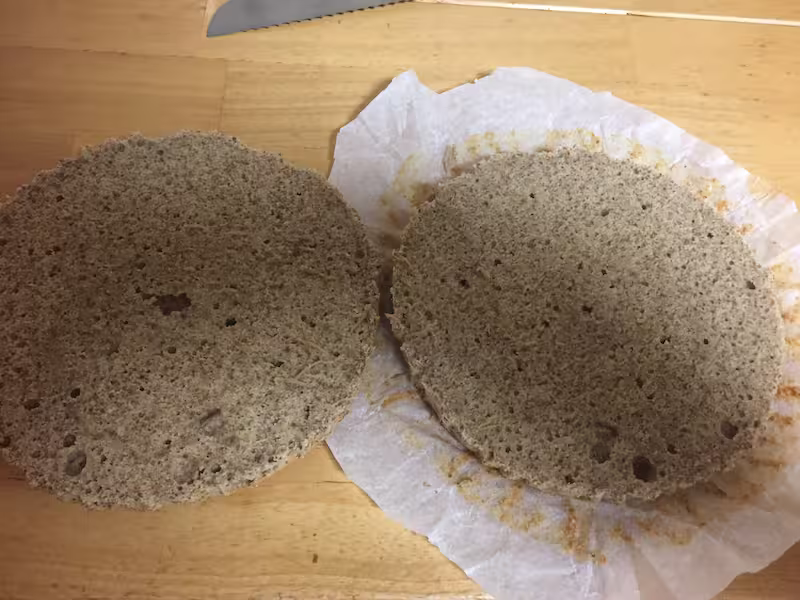
Step 9: Cut the cake
Once cool, I cut the cake in half horizontally with a serrated knife. This way we get two discs so we can fill the cake.
Step 10: Spread the filling
I spread the filling mixture on the bottom half of the cake. Thanks to the cheese, the mixture is quite consistent and easy to spread.

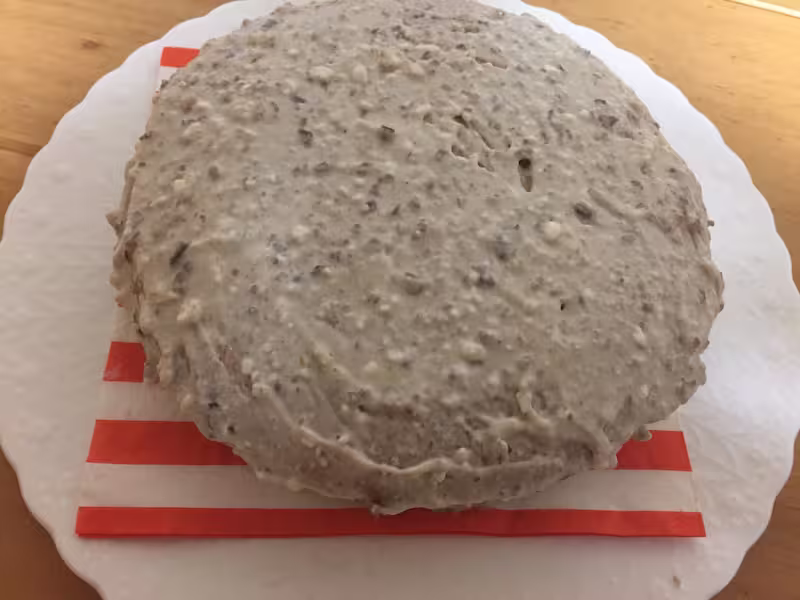
Step 11: Cover the cake
I place the other half of the cake on top and also cover the top part with the mixture. This way the cake takes on its final shape, with that appetizing white appearance.
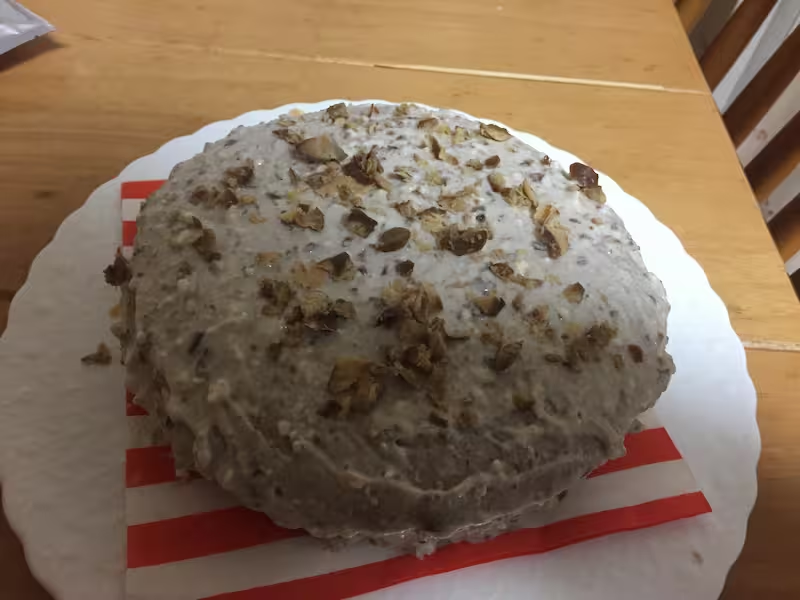
Step 12: The final decoration
To finish, I add small pieces of cooked chestnuts crumbled on top. This gives it texture, a touch of color, and highlights the main ingredient.
Step 13: The result
And here's the final result: a slice of cake on a plate, with its moist sponge cake, its chestnut cream, and the crumbles on top. A dessert with an appetizing appearance, simple and full of flavor.
Tip: For the cake to be at its best, it's better to prepare it a few hours before serving, or even the day before. This way the flavors settle and the texture is perfect.
And that's all. I hope you're encouraged to try this recipe at home. It's not difficult and the result is well worth it, especially if you're lucky enough to have seasonal chestnuts.
Happy holidays and happy cooking!
Back to Blog